Softened Water Equipment Installation and Commissioning: Complete Management Guide 2026
Proper softened water equipment installation and commissioning is critical for ensuring long-term system reliability, efficient operation, and compliance with engineering standards. From pre-assembly preparation and equipment assembly to on-site installation, debugging, and quality control — each phase requires systematic management procedures. This guide presents a comprehensive framework for managing the installation and commissioning of water softening equipment, covering assembly preparation, installation protocols, commissioning steps, and quality verification checkpoints.
Softened Water Equipment Installation and Commissioning: Management Framework Overview
The installation and commissioning process for softened water equipment follows a structured sequence of phases: pre-assembly preparation, equipment assembly, pre-installation preparation, on-site installation and debugging, and final commissioning verification. Each phase has specific management requirements, documentation standards, and quality control checkpoints that must be followed to ensure project success. The management framework outlined here is based on established engineering practices for sodium ion exchange water softening systems and has been refined through years of field experience across industrial, commercial, and utility applications.
| Phase | Key Activities | Documentation Required | Duration |
| 1. Pre-assembly preparation | Task assignment, material verification, specification review | Assembly task book, BOM, drawings | 1-2 days |
| 2. Equipment assembly | Component fabrication, sub-assembly, pressure testing | Assembly records, inspection reports | 3-7 days |
| 3. Pre-installation preparation | Site inspection, foundation verification, utility connections | Site checklist, utility verification | 1-2 days |
| 4. On-site installation | Equipment positioning, piping, electrical, instrumentation | Installation log, as-built drawings | 2-5 days |
| 5. Commissioning and debugging | Startup, parameter adjustment, performance testing | Commissioning report, test data | 1-3 days |
Following this systematic approach minimizes installation errors, reduces commissioning time, and ensures the equipment operates at its designed performance from the start of service.
Preparation Before Assembly
Proper preparation before assembly is the foundation of a successful installation project. The following management procedures must be followed:
- Official task authorization — Assembly work begins only upon receipt of the official “Softened Water Equipment Assembly Task Book” (or equivalent fax document) bearing the company’s official seal. This document specifies the complete equipment configuration, component specifications, model numbers, and the required completion timeline.
- Complete and standardized documentation — The task book must include specific details on equipment configuration, component specifications, model numbers, and time requirements for assembly completion. The batching clerk initiates material requisition based on the bill of materials (BOM) defined in the task book.
- Material verification — All components, fittings, valves, piping, and electrical parts must be verified against the BOM before assembly begins. Any discrepancies must be reported and resolved before proceeding.
- Work area preparation — The assembly area must be clean, well-lit, and organized. Specialized tools and testing equipment should be calibrated and available before assembly starts. Safety equipment including PPE must be verified available.
Completing these preparatory steps systematically reduces the risk of assembly errors and material shortages that can delay project completion.
Assembly Process for Softened Water Equipment
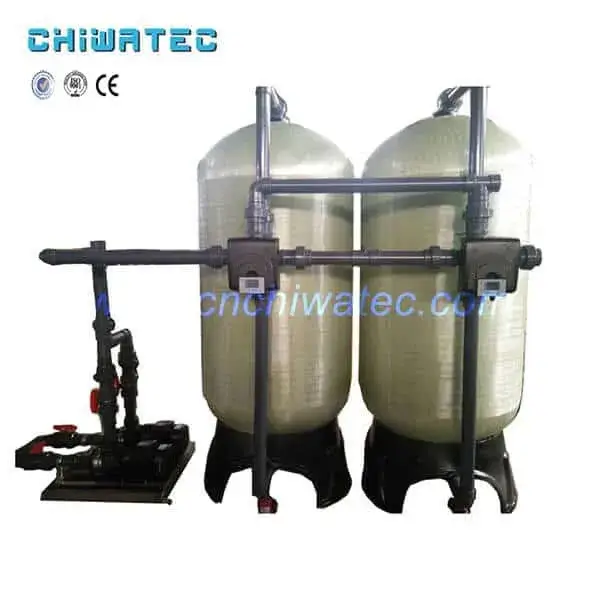
The assembly phase involves fabricating and assembling the system components according to the approved design specifications:
| Assembly Stage | Activities | Quality Checkpoint |
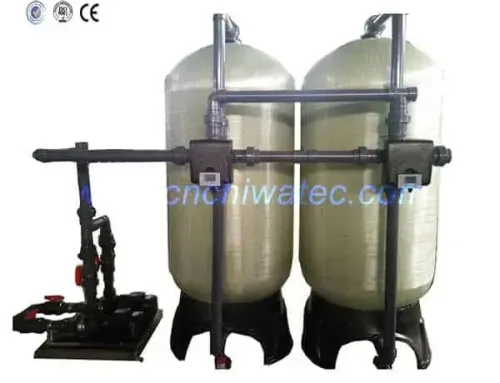
| Frame and vessel assembly | Mount exchange vessels on frame, align and level | Level within tolerance; all bolts torqued to spec |
| Piping installation | Connect inlet/outlet piping, drain lines, brine line | No leaks at 1.5x working pressure test |
| Valve manifold assembly | Install rotary valve or multi-port valve with actuators | Smooth rotation; limit switches properly adjusted |
| Control panel wiring | Connect motor, sensors, solenoid valves, controller | Wiring verified against electrical schematic |
| Brine system assembly | Install brine tank, salt grid, brine valve, float assembly | Float set to correct brine draw level |
| Resin loading | Fill exchange vessels with calculated resin volume | Resin height 85-90% of vessel height |
Each assembly stage must be documented with sign-off from the assembly technician and quality inspector before proceeding to the next stage.
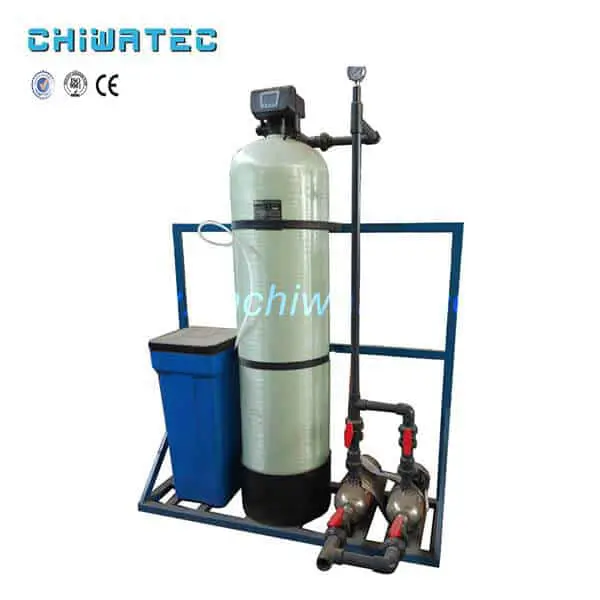
Preparation Before On-Site Installation and Commissioning
Before transporting assembled equipment to the installation site, the following preparatory work must be completed:
- Site inspection — Verify that the installation location meets all requirements: indoor environment above freezing, adequate floor drainage, sufficient clearance (minimum 0.5 meters on all sides for maintenance access), and proper lighting.
- Utility verification — Confirm that incoming water pressure is within the required range (0.2-0.6 MPa), electrical supply matches the control panel specifications, and drainage connections are available. If water pressure falls outside specifications, arrange for pressure regulation equipment.
- Foundation preparation — The installation surface must be level and capable of supporting the equipment weight. While specialized foundations are not typically required for standard softeners, the area should have a nearby sewage channel for discharge water. Verify that the floor can support the filled vessel weight (approximately 1.5-2x the empty equipment weight).
- Soft water storage tank — Configure a softened water storage tank with internal anti-corrosion lining to prevent re-contamination of treated water. The tank volume should be sized based on peak demand requirements.
- Pipeline flushing — Before connecting the equipment, flush all incoming and outgoing pipelines to remove debris, welding slag, and construction contaminants that could block distribution systems or contaminate the resin.
These preparatory steps prevent the most common causes of commissioning delays and startup failures.
Installation and Debugging Procedures
The on-site installation and debugging phase follows a systematic sequence to ensure proper equipment setup and performance verification:
- Equipment positioning — Carefully move the assembled softener to its final position. Ensure the unit is level using adjustable feet or shims. Verify clearance for maintenance access.
- Piping connections — Connect inlet water supply, outlet to service, drain line, and brine line according to the piping and instrumentation diagram (P&ID). Install isolation valves and bypass piping as specified. All connections should be leak-tested.
- Electrical connections — Connect power supply to the control panel. Verify that the switchboard housing is properly grounded. Re-tighten all wiring bolts, especially motor connections and limit switch terminals.
- Pre-startup checks — Verify brine tank contains salt and saturated brine solution. Confirm resin bed height is at specification (85-90% fill rate). Check rotary valve operation by turning the pulley by hand through one complete cycle.
- Initial startup — Begin with a manual regeneration cycle. Observe valve positioning, brine draw, slow rinse, and fast rinse stages. Verify that the time relay operates correctly. Do not adjust the time relay during active operation.
- Performance testing — After startup, let the system operate through at least one full service cycle. Measure effluent hardness regularly. The treated water hardness should be below the specified target (typically less than 17.1 mg/L or 1 grain per gallon).
- Parameter optimization — Based on test results, adjust regeneration settings (brine dosage, rinse times, backwash flow) to optimize salt consumption and water efficiency while maintaining effluent quality within specification.
Upon successful completion of all debugging procedures, prepare a commissioning report documenting all test results, parameter settings, and any adjustments made during the commissioning process.
Softened Water Equipment Installation and Commissioning: Quality Control Checklist
Use this softened water equipment installation and commissioning checklist to verify that all critical requirements have been met before signing off on the project:
| Category | Check Item | Acceptance Criteria | Verified |
| Pre-assembly | Task book complete and approved | BOM matches equipment specification | ☐ |
| Assembly | Pressure test completed | No leaks at 1.5x working pressure | ☐ |
| Assembly | Resin loaded correctly | Resin height 85-90% of vessel height | ☐ |
| Site prep | Installation location suitable | Indoor, above freezing, drain available | ☐ |
| Site prep | Inlet water pressure verified | 0.2-0.6 MPa | ☐ |
| Site prep | Pipelines flushed before connection | Debris-free water at connection point | ☐ |
| Installation | Equipment level and properly positioned | Level within 2 mm/m | ☐ |
| Installation | Electrical connections verified | Grounding intact, all bolts tight | ☐ |
| Installation | Brine system operational | Salt > brine level, float set correctly | ☐ |
| Commissioning | Manual regeneration cycle completes | All stages function normally | ☐ |
| Commissioning | Effluent hardness meets target | < 1 grain per gallon (17.1 mg/L) | ☐ |
| Commissioning | Commissioning report submitted | All parameters documented | ☐ |
This checklist serves as both a project management tool and a quality assurance record. Each item must be signed off before the system is handed over for regular operation.
Frequently Asked Questions
How long does it take to install and commission a water softener?
A typical installation project takes 5-15 days from pre-assembly preparation through final commissioning. Pre-assembly and equipment fabrication take 3-7 days, on-site installation takes 2-5 days, and commissioning and debugging take 1-3 days. Total duration depends on system complexity, site conditions, and crew experience.
What documentation is needed before starting installation?
The essential documents include: an approved equipment assembly task book with a complete bill of materials, system design drawings, a piping and instrumentation diagram (P&ID), electrical schematics, and the manufacturer’s installation manual. Site preparation documentation and utility verification records should also be completed before installation begins.
What water pressure is required for water softener installation?
The incoming water pressure must be between 0.2 MPa (29 psi) and 0.6 MPa (87 psi). If the site water pressure is below 0.2 MPa, a booster pump must be installed. If above 0.6 MPa, a pressure-reducing valve is required to protect the equipment from excessive pressure.
How is the resin volume determined during installation?
The resin fill rate should be 85-90 percent of the exchange vessel height. The exact resin volume is calculated based on the vessel diameter, vessel height, and the required exchange capacity. A typical 1.0-meter diameter vessel with 1.8-meter straight height requires approximately 1,200-1,400 liters of cation exchange resin at 85-90 percent fill.
What tests should be performed during commissioning?
Essential commissioning tests include: a pressure test of all piping connections at 1.5x working pressure, a manual regeneration cycle test to verify all valve positions and timings, effluent hardness testing after startup, brine draw rate measurement, and verification of backwash flow rate against the manufacturer’s specification. A full commissioning report documenting all results should be prepared.
Conclusion and Call to Action
Following a systematic softened water equipment installation and commissioning process — from pre-assembly preparation and quality-controlled assembly to on-site installation, debugging, and final performance verification — ensures that your water softening system operates reliably and efficiently from day one. The management framework and quality control checklist presented here provide a proven approach for engineering teams, project managers, and facility operators.
CHIWATEC is a high-tech enterprise specialized in various water processing devices, including water softening equipment, installation services, and comprehensive water treatment engineering projects. Our experienced team can manage your complete softening equipment installation from assembly through commissioning.
Contact us today to discuss your water softening installation requirements:
Email: [email protected]
Email: [email protected]
Related Resources and Further Reading
- Water Softening Equipment Installation Requirements and Guide 2026
- Water Softener Usage Guide: How to Use and Maintain Softened Water Equipment 2026
- Boiler Water Softening Equipment: Configuration, Control Technology, and Selection Guide 2026
- Boiler Softening Water Equipment: Technical Indicators and Operating Requirements 2026
- Browse Water Softening Systems — Product Range
Do you have a water treatment project we can help with
* Designing,machining,installing,commissioning, customize and one-stop service

 English
  Spanish
  Portuguese